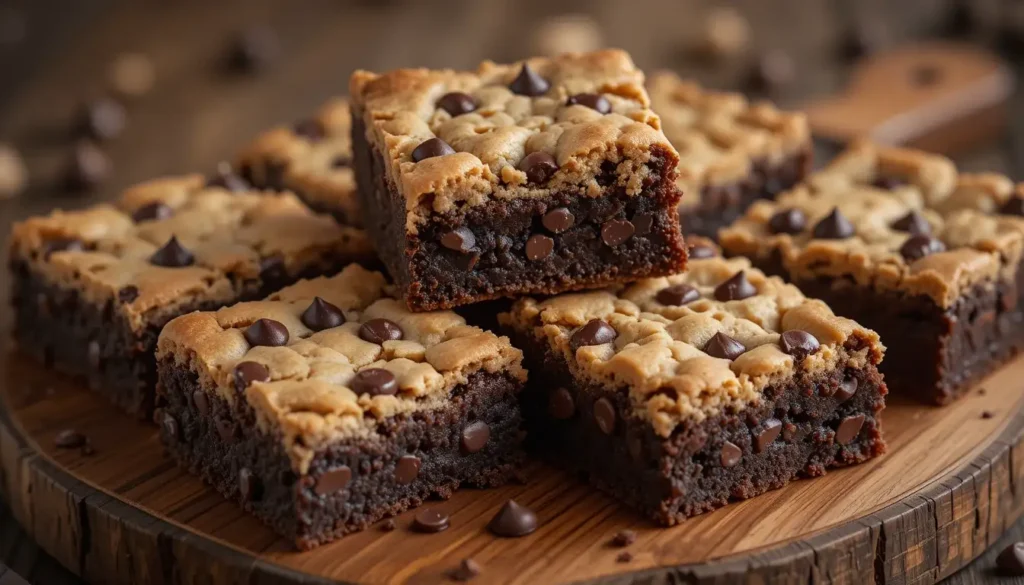
Imagine biting into a dessert that combines the fudgy richness of a brownie with the chewy, golden perfection of a chocolate chip cookie. That, my friend, is a Brookie—a sweet masterpiece that’s equal parts indulgence and nostalgia.
I remember the first time I tried to make a Brookie. I was confident, excited, and completely clueless. I thought I could just throw brownie batter and cookie dough into a pan, bake it, and voilà—dessert perfection. But what I got instead was a confusing mess: a half-baked, soggy brownie drowning under an overcooked, rock-hard cookie layer. I almost gave up. But, stubborn as I am, I kept experimenting until I found the secret to assembling the perfect Brookie.
If you’ve ever faced the same struggle, or you just want to master this dessert from the get-go, you’re in the right place. By the end of this guide, you’ll know how to assemble a Brookie with confidence, ensuring every bite is the perfect balance of chewy, gooey, and crispy.
Table of Contents
What is a Brookie?
Let’s clear something up—what exactly is a Brookie? The name is a delightful blend of “brownie” and “cookie,” and that’s precisely what it is: a layered dessert where a rich, chocolatey brownie base meets a golden, chewy cookie top.
“A Brookie is not just a dessert—it’s an experience. It’s the best of both worlds, where indulgence meets comfort in every bite.”
Unlike other hybrid desserts that might feel like a gimmick, the Brookie stands strong as a staple for those who can’t choose between cookies and brownies. It’s perfect for bake sales, family gatherings, or just treating yourself after a long day.
Why Brookies Are the Best Dessert Hybrid
You might be wondering, why go through the trouble of making a Brookie when you could just bake brownies or cookies separately? Here’s why:
- Best of Both Worlds: You don’t have to choose between cookies or brownies—you get both!
- Textural Perfection: The crisp edges of a cookie contrast beautifully with the dense, fudgy brownie layer.
- Visually Stunning: A well-made Brookie looks as amazing as it tastes, making it a showstopper at any event.
- Endless Variations: You can get creative with add-ins like nuts, caramel, peanut butter, or even Oreos.
Ingredients for Making a Perfect Brookie
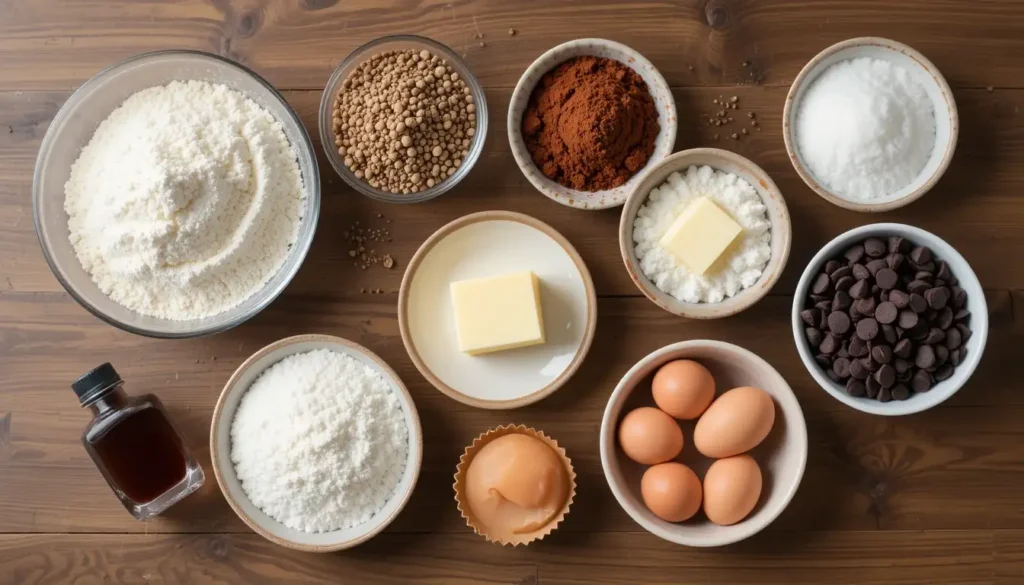
Before you start baking, you need the right ingredients. Below is what you’ll need:
| Category | Ingredients |
|---|---|
| Brownie Base | Unsalted butter, sugar, cocoa powder, eggs, vanilla extract, flour, baking powder, salt |
| Cookie Dough | Butter, sugar, brown sugar, eggs, vanilla extract, flour, baking soda, salt, chocolate chips |
| Optional Add-ons | Sea salt, peanut butter, caramel chunks, white chocolate chips |
Essential Tools and Equipment
Aside from ingredients, having the right tools will make your Brookie assembly easier and more precise.
Baking Pans and Molds
A square or rectangular baking pan works best for Brookies. You can use a glass or metal pan, but keep in mind that metal heats up faster and gives you crispier edges.
Mixing Tools for a Smooth Dough
A stand mixer or hand mixer can help you achieve smooth brownie batter and well-incorporated cookie dough. If you’re doing everything by hand, a whisk and spatula will do the trick.
Measuring Cups and Precision Baking
Getting the measurements right is crucial! Always use proper measuring cups and spoons for accuracy.
How to Prepare the Brownie Layer
The first step in assembling a Brookie is preparing the brownie base. Here’s how:
- Melt the Butter and Cocoa: In a saucepan, melt the butter over low heat, then stir in cocoa powder until smooth.
- Mix in the Sugar: Remove from heat and whisk in granulated sugar until well combined.
- Add the Eggs: Whisk in the eggs one at a time, ensuring each is fully incorporated.
- Incorporate the Dry Ingredients: In a separate bowl, combine flour, baking powder, and salt. Gradually add this to the wet mixture, stirring until smooth.
- Pour into Pan: Grease a baking pan and pour the brownie batter evenly into the base.
“The key to a perfect Brookie is starting with a thick, rich brownie base that won’t get overshadowed by the cookie layer.”
How to Prepare the Cookie Dough Layer
The second half of the Brookie equation is the cookie dough layer. Follow these steps:
- Cream the Butter and Sugars: In a mixing bowl, beat softened butter with granulated and brown sugar until light and fluffy.
- Add the Eggs and Vanilla: Mix in the eggs one at a time, then add vanilla extract.
- Mix Dry Ingredients: In another bowl, whisk together flour, baking soda, and salt.
- Combine Everything: Slowly add the dry ingredients to the wet ingredients, mixing until just combined.
- Fold in the Chocolate Chips: Stir in the chocolate chips for that classic cookie crunch.
Now that both layers are prepared, we’re ready for the fun part—assembling the Brookie! Stay tuned for the next steps, where we’ll cover layering techniques, baking tips, and common mistakes to avoid.
How to Assemble a Brookie Properly
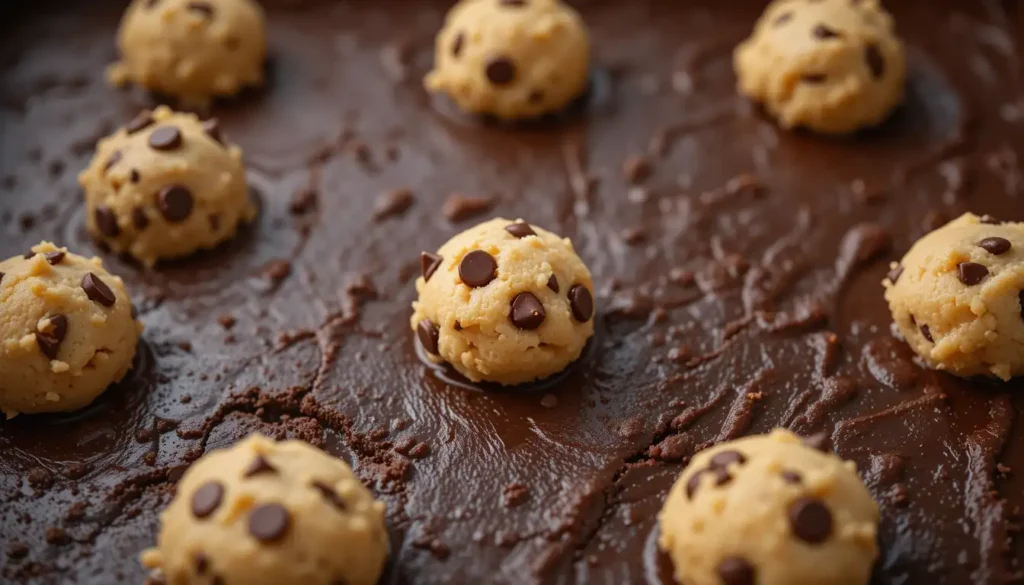
Now that we have our cookie dough and brownie batter ready, it’s time for the most crucial step—assembling the Brookie. This is where the magic happens, and a little precision can make the difference between a perfectly layered Brookie and a baked disaster.
The Layering Technique
Getting the perfect balance between brownie and cookie layers requires a little patience and the right approach. Follow these steps to ensure your Brookie turns out with distinct yet harmonious layers:
- Start with the Brownie Base: Pour the brownie batter into a greased or parchment-lined baking pan. Use a spatula to spread it evenly across the bottom. This forms the rich, fudgy foundation of your Brookie.
- Add the Cookie Dough: Using a spoon or your hands, drop dollops of cookie dough on top of the brownie batter. Do not spread it out completely—this will allow some areas of brownie to remain exposed for a visually appealing marbled effect.
- Press Lightly: Gently press the cookie dough down so it settles into the brownie batter without sinking completely. You want both layers to bake at the same rate, so don’t push the dough too deep.
“The trick to a well-layered Brookie is allowing the brownie batter to set slightly before adding the cookie dough—this prevents the cookie dough from sinking too much.”
Swirling Methods for a Unique Look
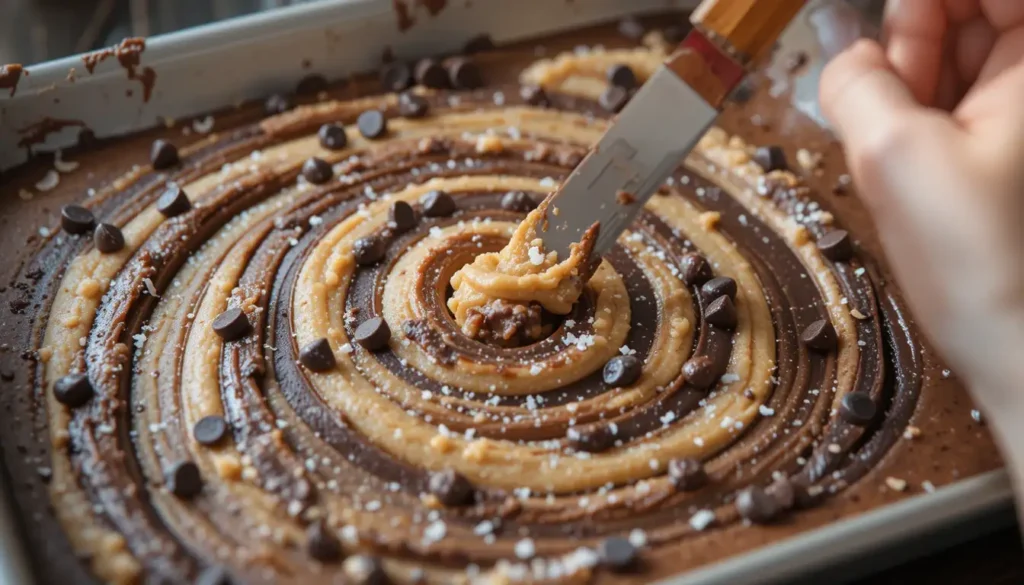
Want to make your Brookie look extra fancy? Try these swirling techniques:
- Knife Swirl: Use a butter knife to make gentle swirls between the brownie and cookie layers. This creates a beautiful marbled effect.
- Fork Drag: Run a fork through the surface in a zigzag pattern to create a subtle fusion of the layers.
Adding Extra Toppings for Texture
If you want to take your Brookie to the next level, consider these tasty add-ons:
- Chocolate Chunks: Sprinkle extra chocolate pieces on top for a richer flavor.
- Sea Salt Flakes: A touch of sea salt enhances the sweetness and adds depth to each bite.
- Chopped Nuts: Walnuts, pecans, or almonds add a delightful crunch.
- Caramel Drizzle: Swirling caramel over the top before baking adds a gooey contrast.
Baking the Brookie to Perfection
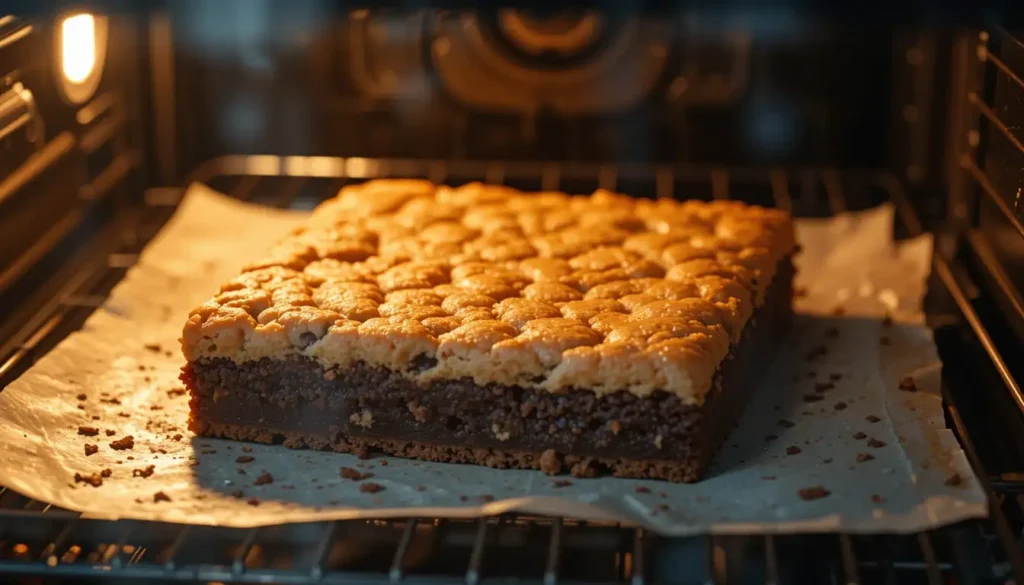
Once your Brookie is fully assembled, it’s time to bake! But beware—overbaking or underbaking can ruin the texture.
Optimal Baking Temperature and Time
- Preheat your oven to 350°F (175°C).
- Bake for 30–35 minutes. Start checking at the 25-minute mark if you prefer a gooier texture.
How to Tell If Your Brookie Is Done
Don’t just rely on the timer—here’s how to check for doneness:
- Toothpick Test: Insert a toothpick into the center. It should come out with a few moist crumbs but no raw batter.
- Golden Cookie Layer: The cookie layer should be golden brown but not too dark.
- Firm Edges: The edges should be slightly crisp, while the center remains slightly soft.
Cooling and Cutting for the Best Presentation
The hardest part? Waiting! But cooling is essential for clean slices.
How to Cool a Brookie
- Let the Brookie cool in the pan for at least 20 minutes.
- For cleaner cuts, refrigerate for 15 minutes before slicing.
Cutting Tips for Perfect Squares
- Use a Sharp Knife: A dull knife will crush the layers instead of slicing through them.
- Clean the Knife Between Slices: Wipe with a damp cloth to get smooth, clean cuts.
Creative Serving Ideas for Brookies
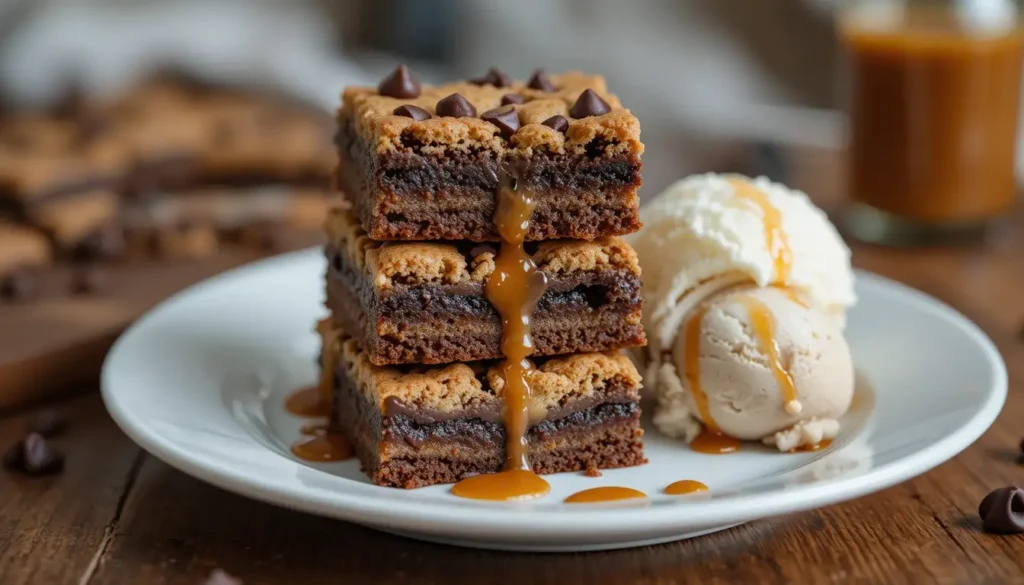
Want to impress your guests? Try serving Brookies in creative ways:
- Brookie Sundae: Top with a scoop of vanilla ice cream and a drizzle of caramel sauce.
- Brookie Bars: Cut into long, rectangular strips for a modern presentation.
- Brookie Sandwich: Place a scoop of ice cream between two Brookie squares.
Storage Tips for Keeping Brookies Fresh
Room Temperature
- Store in an airtight container.
- Best eaten within 3–4 days.
Freezing for Longer Storage
- Wrap individual squares in plastic wrap.
- Store in a freezer-safe container for up to 3 months.
- To reheat, microwave for 10–15 seconds.
Common Brookie Baking Mistakes and How to Avoid Them
Dough Separation Issues
Problem: The brownie and cookie layers don’t blend well.
Solution: Ensure the brownie layer is slightly set before adding the cookie dough.
Over or Underbaking
Problem: The Brookie is either too raw in the middle or too dry.
Solution: Use the toothpick test and adjust baking time accordingly.
Achieving the Right Texture Balance
Problem: The brownie is too dense, or the cookie layer is too crispy.
Solution: Use high-quality chocolate and room-temperature ingredients for even baking.
Fun Variations of the Classic Brookie
Peanut Butter Swirl Brookies
Swirl peanut butter into the brownie layer for an extra creamy touch.
Oreo-Stuffed Brookies
Layer crushed Oreos between the brownie and cookie layers for a crunchy surprise.
Salted Caramel Brookies
Drizzle caramel before baking and sprinkle with sea salt.
If you are a dessert lover check this 3 Ingredient No Bake Cheesecake or this Fairy Brownies guide!
FAQs About Making and Assembling Brookies
Can I use a brownie mix and cookie mix?
Yes! While homemade tastes best, store-bought mixes work in a pinch.
Why did my cookie dough sink?
The brownie batter may have been too thin—chill it slightly before adding cookie dough.
Can I make Brookies in cupcake form?
Yes! Adjust baking time to 18–20 minutes.
Conclusion: Mastering the Art of Brookie Assembly
There you have it! Now you know how to assemble a Brookie like a pro. From layering to baking, cutting, and serving, every step plays a role in achieving dessert perfection. Whether you stick to the classic version or experiment with new flavors, one thing is certain: Brookies are the ultimate treat for anyone who loves both brownies and cookies.
Ready to bake? Grab your ingredients and let the delicious fun begin!
Print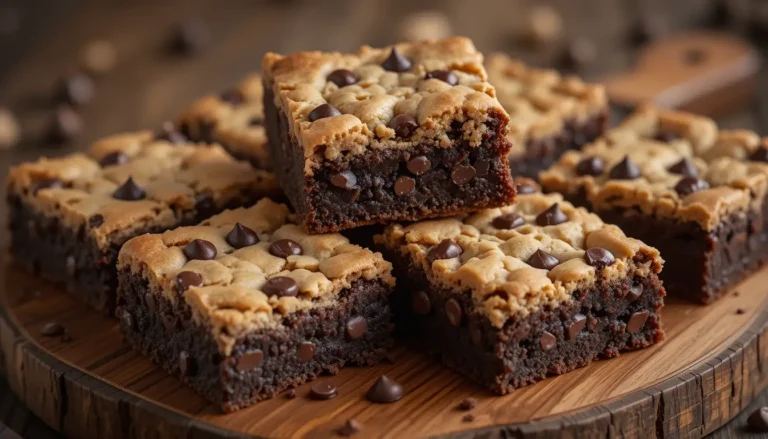
How to Assemble a Brookie: Easy Step-by-Step Guide
A perfect balance of chewy chocolate chip cookies and fudgy brownies in one decadent treat—crispy on the edges, gooey in the center, and totally irresistible!
- Total Time: 45 minutes
- Yield: 9–12 1x
Ingredients
For the Brownie Layer:
- 1/2 cup unsalted butter, melted
- 1/2 cup sugar
- 1/2 cup brown sugar
- 2 eggs
- 1 tsp vanilla extract
- 1/3 cup cocoa powder
- 1/2 cup all-purpose flour
- 1/4 tsp salt
- 1/4 tsp baking powder
For the Cookie Layer:
- 1/2 cup unsalted butter, softened
- 1/2 cup brown sugar
- 1/4 cup sugar
- 1 egg
- 1 tsp vanilla extract
- 1 cup all-purpose flour
- 1/2 tsp baking soda
- 1/4 tsp salt
- 1/2 cup dark chocolate chunks
Instructions
- Preheat oven to 350°F (175°C). Line an 8×8-inch baking dish with parchment paper.
- Prepare the brownie layer: Whisk melted butter, sugars, eggs, and vanilla. Stir in cocoa, flour, salt, and baking powder. Spread in the pan.
- Prepare the cookie layer: Beat butter and sugars until fluffy. Mix in egg and vanilla. Stir in flour, baking soda, salt, and chocolate chunks.
- Drop spoonfuls of cookie dough over the brownie batter and gently spread.
- Bake for 25-30 minutes, until golden on top and a toothpick inserted comes out with a few moist crumbs.
- Cool before slicing into squares. Enjoy!
- Prep Time: 15
- Cook Time: 30
Nutrition
- Serving Size: 1
- Calories: 320

