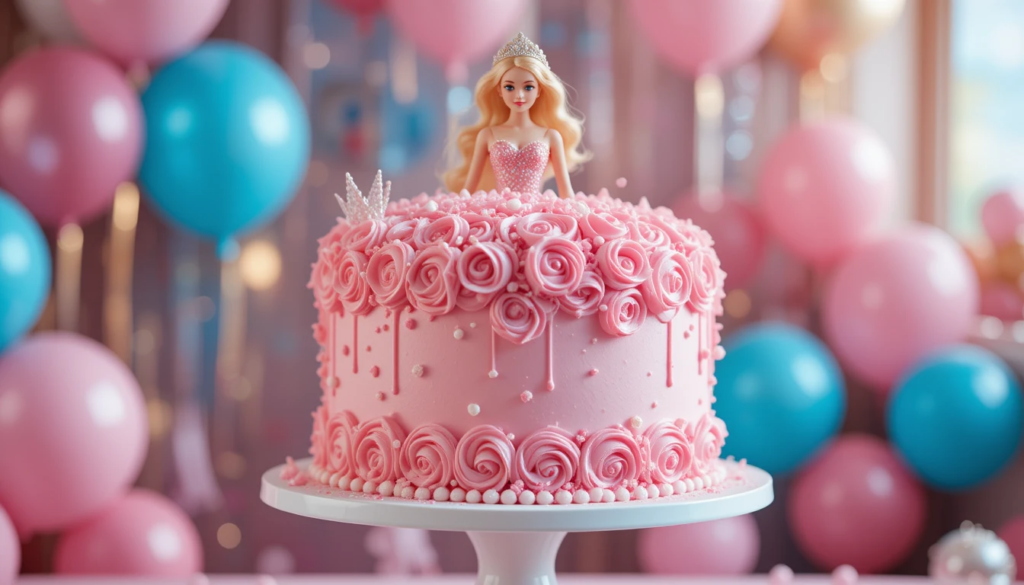
Who doesn’t love a beautifully decorated Barbie cake? Whether it’s for a birthday, a baby shower, or just a fun baking project, Barbie cakes are always a hit. But how do you make one that looks amazing and tastes delicious?
Don’t worry—I’ve got you covered! In this ultimate guide, we’ll dive deep into everything you need to know, from choosing the perfect design to fixing common baking mistakes. Let’s get started!
Table of Contents
What is a Barbie Cake?
A Barbie cake is a creative, dress-shaped cake with a real or edible Barbie doll placed in the center. The cake is carved and decorated to resemble a glamorous gown, making it a perfect centerpiece for any celebration.
Why Barbie Cakes Are Popular for Celebrations?
- Perfect for birthdays: Every little girl dreams of a Barbie-themed party!
- Instagram-worthy: These cakes look stunning and make for a great social media post.
- Customizable: You can design the dress in any style, color, or theme.
History and Evolution
The Barbie cake trend started in the 1990s and has evolved with modern cake-decorating techniques. With the rise of social media, professional and home bakers now create jaw-dropping designs that inspire millions worldwide.
“A Barbie cake is not just a dessert; it’s a work of edible art!”
Choosing the Perfect Design
Popular Themes and Styles
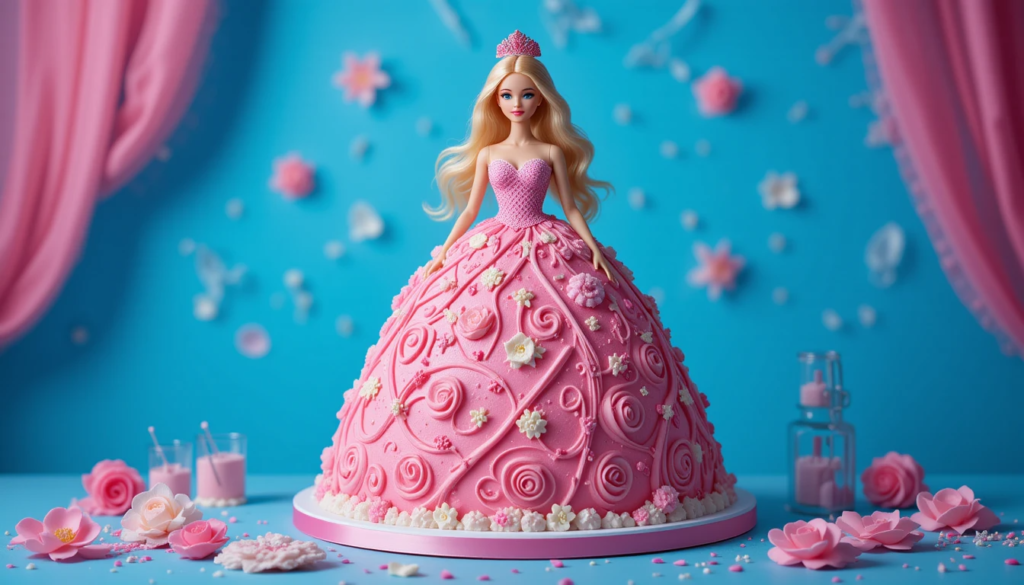
When it comes to Barbie cakes, the options are endless! Here are some of the most popular themes:
- 🌸 Princess Barbie Cake: Think pastel colors, pearls, and a flowing fondant gown.
- 💎 Frozen Barbie Cake: Inspired by Elsa, with shades of blue and snowflake decorations.
- 🌹 Floral Barbie Cake: Buttercream or fondant flowers covering the dress.
- 🔥 Superhero Barbie Cake: A bold, powerful look with capes and action-packed details.
Choosing the Right Color Scheme
Your color palette will define the elegance of your Barbie cake. Here are some classic choices:
- 💖 Pink and Gold: A timeless Barbie color combo.
- 💜 Lavender and Silver: A magical and elegant look.
- 💙 Blue and White: Perfect for an Elsa-inspired theme.
Customizing Barbie Cakes for Different Occasions
Want to make your Barbie cake extra special? Try these ideas:
- 🎓 Graduation Barbie Cake: Dress Barbie in a fondant graduation gown.
- 💍 Wedding Barbie Cake: A mini bridal gown for a bridal shower theme.
- 🌞 Summer Vibes Barbie Cake: Add beach accessories and a tropical feel.
“Your imagination is the only limit when designing a Barbie cake!”
Essential Ingredients and Tools for Making a Barbie Cake
Before we jump into the baking process, let’s make sure you have all the right ingredients and tools.
Must-Have Ingredients for a Moist and Delicious Cake
| Ingredient | Quantity |
|---|---|
| All-purpose flour | 3 cups |
| Sugar | 2 cups |
| Butter | 1 cup (softened) |
| Eggs | 4 large |
| Baking powder | 2 tsp |
| Vanilla extract | 1 tsp |
| Milk | 1 cup |
Best Tools and Equipment for Perfect Decoration
To get that professional look, make sure you have these tools:
- 🎂 Oven-safe bowl: This helps shape the skirt of the Barbie cake.
- 🔪 Sharp serrated knife: For carving and leveling.
- 🥄 Offset spatula: Helps spread frosting smoothly.
- 🎨 Piping bags and nozzles: For intricate buttercream designs.
Where to Buy Barbie Cake Toppers and Accessories?
If you don’t have a Barbie doll, you can buy an official Barbie cake topper online. Some great places to check:
- 🛒 Amazon
- 🎂 Cake decorating specialty stores
- 🏬 Local toy stores
“A great cake starts with great ingredients and the right tools!” 🍴
Step-by-Step Guide to Making The Cake
Baking the Base Cake – Best Recipes and Tips
First, let’s bake the actual cake layers that will form Barbie’s dress. Here’s a simple step-by-step process:
- Preheat the oven to 350°F (175°C).
- Grease an oven-safe mixing bowl and two 8-inch cake pans.
- In a large bowl, whisk together the flour, baking powder, and salt.
- In another bowl, beat the butter and sugar until fluffy.
- Add the eggs one at a time, then mix in the vanilla extract.
- Gradually add the dry ingredients while alternating with the milk.
- Pour the batter into the prepared pans and bake for 40-45 minutes.
Once baked, allow the cakes to cool completely before assembling.
Carving and Stacking the Cake for a Perfect Barbie Dress Shape
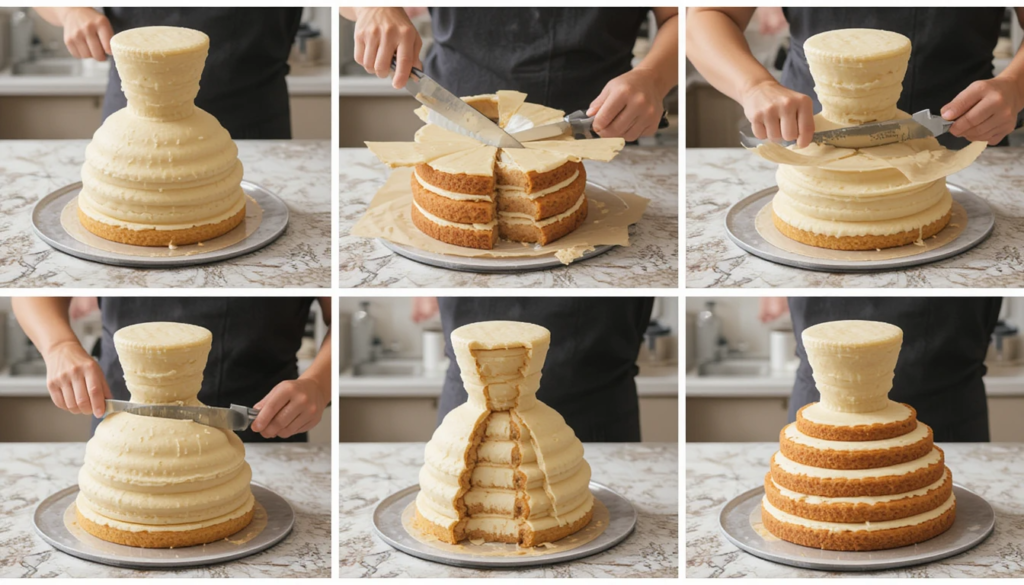
Now that your cakes are baked and cooled, it’s time to shape them into Barbie’s gorgeous dress. This is where the magic begins! ✨
Step 1: Leveling the Cake Layers
A wonky cake = a wonky Barbie dress. We need to make sure everything is even before stacking.
- Use a serrated knife to carefully trim the top of each cake layer.
- Make sure each layer is flat and even to prevent tilting.
- Set aside the trimmed cake scraps (we’ll use them later for extra support!).
Step 2: Stacking the Cake
It’s time to build the dress! Here’s how:
- Place the first cake layer on a cake board or stand.
- Spread a layer of buttercream on top to act as “glue.”
- Repeat with the remaining layers, stacking them one by one.
- Once stacked, place the dome-shaped cake (baked in the oven-safe bowl) on top.
At this point, your cake should resemble a big skirt! 👗 But we’re not done yet.
Step 3: Carving the Skirt Shape
To get that elegant dress shape:
- Use a sharp knife to carve the edges of the cake, making it rounder at the top and slightly flared at the bottom.
- Don’t stress too much—frosting will smooth out any imperfections!
Step 4: Inserting the Barbie Doll
Now for the star of the show—Barbie herself! 🌟
- Wrap the bottom half of the Barbie doll in plastic wrap (to keep it clean). 🛡️
- Gently push the doll into the center of the cake.
- If the hole isn’t deep enough, remove the doll and scoop out a little cake.
- Make sure Barbie stands upright!
Now, it’s time to make her dress truly shine! ✨
Frosting and Decorating Techniques
The frosting is what transforms this cake from a simple stack into a show-stopping masterpiece. Let’s go over the best ways to decorate!
Step 1: Crumb Coating the Cake
A crumb coat is a thin layer of frosting that traps crumbs and creates a smooth base for decorating.
- Use a spatula to spread a light layer of buttercream all over the cake.
- Chill for 15-30 minutes to set.
Step 2: Piping the Dress Design
Here’s where you get creative! You can use:
- 💖 Buttercream Ruffles: Use a petal piping tip to create cascading ruffles.
- 🌟 Fondant Drapes: Roll out fondant and drape it like a real gown.
- ✨ Rosette Swirls: Pipe roses with a star nozzle for a floral effect.
Step 3: Adding Sparkle and Details
Enhance Barbie’s dress with:
- 🌈 Edible glitter for a shimmering effect.
- 💎 Sugar pearls for an elegant look.
- 🎀 Edible lace for a touch of sophistication.
“The secret to a stunning Barbie cake? Texture and color! Don’t be afraid to mix piping styles.”
Common Problems When Making a Barbie Cake & How to Fix Them
Let’s face it—baking isn’t always smooth sailing. Here are some common Barbie cake problems and how to fix them.
1. Cake Collapsing or Sinking
Possible Causes:
- Too much moisture in the batter.
- Undercooked center.
Solution: Bake at the right temperature and test with a toothpick before removing from the oven.
2. Frosting Not Sticking or Melting
Solution: Apply a thin crumb coat and chill before adding the final layer of frosting.
3. Uneven or Cracked Cake Surface
Solution: Trim uneven parts and cover cracks with extra frosting or fondant.
4. Doll Not Staying in Place
Solution: Wrap the doll tightly and secure it with extra frosting around the base.
Pro Tips for a Show-Stopping
- 💡 Chill the cake before carving for a cleaner cut.
- 🎭 Use a mix of buttercream and fondant for more depth.
- 🖌️ Airbrush for a professional-looking finish.
Barbie Cake Trends in 2025 and Beyond
Barbie cakes are evolving! Here are some trending designs:
- 🌌 Galaxy Barbie Cake: A cosmic-themed gown with shimmering stars.
- 🎀 Pastel Ombre: Soft gradients from pink to purple.
- 🌊 Mermaid Barbie Cake: Scales and ocean-inspired colors.
FAQs
How long does it take to make one?
The total time depends on your experience level and the complexity of the design. A basic version can take around 3 to 5 hours, including baking, cooling, carving, and decorating. If you’re adding intricate fondant details or airbrushing, expect it to take longer.
Can I use any doll for it?
Technically, yes! However, make sure the doll is clean and safe for food contact. Some bakers prefer using a food-safe Barbie topper instead of an actual doll to avoid any contamination risks.
What is the best type of frosting to use?
It depends on the finish you want! Buttercream is easy to work with and perfect for ruffled designs, while fondant gives a smooth, polished look. You can also combine both—buttercream for texture and fondant for draping.
How do I transport it safely?
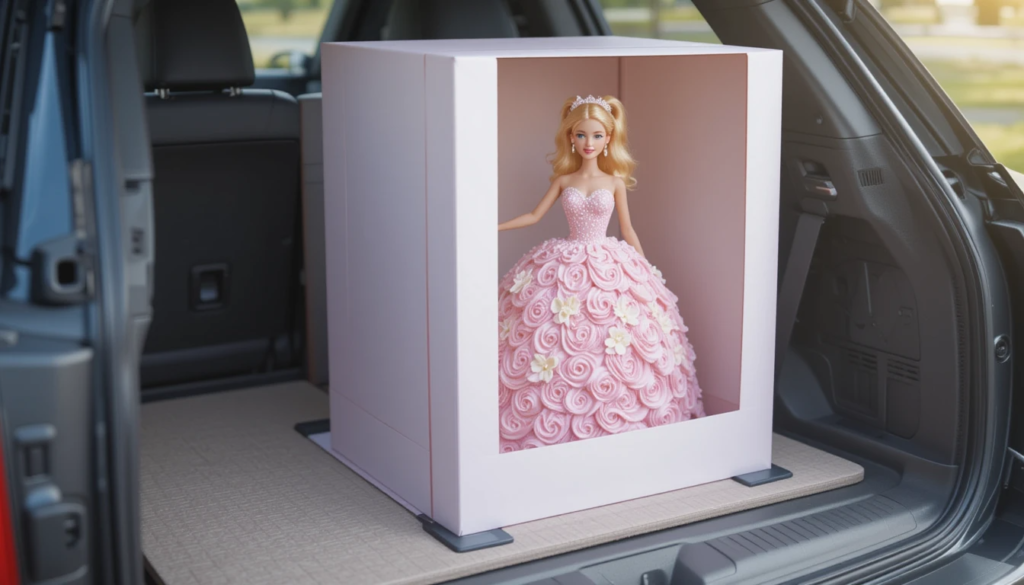
Here are a few precautions:
- Chill it for at least an hour before transport to firm up the frosting.
- Use a sturdy cake board and a cake box with enough height to fit the doll.
- If driving, place it on a flat surface in your car, away from heat.
Can I make it without an oven?
Yes! You can use a no-bake recipe with alternatives like rice cereal treats or pre-made sponge cakes. Another option is using a pressure cooker or microwave to bake the layers if you don’t have access to an oven.
How should I store leftovers?
Keep it fresh by:
- Storing it in an airtight container in the fridge for up to 3-4 days.
- If covered in fondant, avoid refrigeration as it may cause condensation.
- For longer storage, remove the doll and freeze slices wrapped in plastic wrap.
Can I make one in advance?
Absolutely! You can bake and carve the cake layers 1-2 days ahead and store them wrapped in plastic. The full decoration is best done on the day of serving to keep it fresh and vibrant.
What’s the easiest design for beginners?
If you’re new to decorating, go for:
- A simple buttercream rosette dress using a piping bag.
- A basic ruffled fondant skirt without too many intricate details.
- Minimal decorations—sometimes less is more!
How do I make it look more professional?
Some pro tips include:
- Using a turntable for smooth frosting application.
- Chilling between steps to maintain structure.
- Adding edible glitter, pearls, and hand-painted accents for an elegant finish.
What are some unique design ideas?
Want to get creative? Try:
- A mermaid-inspired dress with edible sea shells.
- A galaxy-themed version with swirling colors.
- A bridal edition with a lace-effect gown.
“No matter the design, the most important ingredient is creativity!” 🎨
Final Thoughts
Making a Barbie cake is an exciting and rewarding project! Whether you’re baking for a child’s birthday or just for fun, the joy of creating something this beautiful is unbeatable.
Now, it’s your turn! Grab your ingredients, unleash your creativity, and make a Barbie cake that will leave everyone in awe.
“A cake is not just a cake—it’s a masterpiece waiting to be created.”
If you are a fun of Tiramisu this Article is for you: Can You Use Shortbread Instead of Ladyfingers in Tiramisu?
For a Gluten free version check out this Article: Gluten Free Tiramisu: A Delightful Twist on a Classic Dessert
Print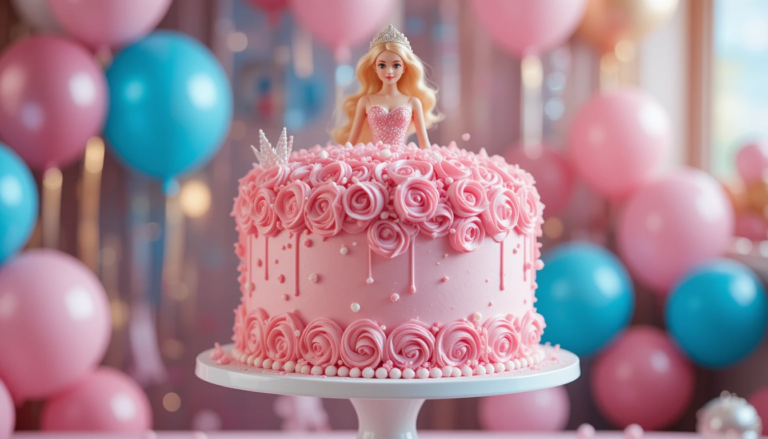
Barbie Cake Recipe 101
- A stunning, princess-perfect Barbie cake that’s as delicious as it is beautiful! Perfect for birthdays and celebrations. 🍰✨
- Total Time: 1 hour 15 minutes
- Yield: 1 1x
Ingredients
For the Cake:
- 3 cups all-purpose flour
- 2 ½ tsp baking powder
- ½ tsp salt
- 1 cup unsalted butter, softened
- 2 cups granulated sugar
- 4 large eggs
- 1 tbsp vanilla extract
- 1 cup whole milk
- Pink gel food coloring
For the Buttercream Frosting:
- 2 cups unsalted butter, softened
- 5 cups powdered sugar
- 2 tsp vanilla extract
- 3 tbsp heavy cream
- Pink gel food coloring
For Decoration:
- 1 Barbie doll (wrapped in plastic wrap)
- Fondant (optional, for details)
- Edible pearls and sprinkles
Instructions
- Prepare the Cake: Preheat oven to 350°F (175°C). Grease and flour a dome-shaped cake pan or use multiple round pans to stack.
- In a bowl, whisk flour, baking powder, and salt. Set aside.
- In a large bowl, cream butter and sugar until fluffy. Add eggs one at a time, then mix in vanilla.
- Alternate adding flour mixture and milk to the batter, mixing well after each addition. Add pink food coloring and mix until evenly combined.
- Pour batter into the prepared pan(s) and bake for 40-45 minutes, or until a toothpick comes out clean. Let cool completely.
- Prepare the Frosting: Beat butter until creamy. Gradually add powdered sugar, then mix in vanilla and cream until smooth. Add pink food coloring.
- Assemble the Cake: If using layers, trim tops for even stacking. Carve the cake into a dress shape if needed.
- Cut a hole in the center for the Barbie doll. Wrap the doll in plastic wrap and insert it into the cake.
- Frost the cake smoothly, then use piping techniques to create a dress-like texture. Decorate with fondant, pearls, and sprinkles as desired.
- Refrigerate for 30 minutes before serving for best results.
- Prep Time: 30 mins
- Cook Time: 45 mins
Nutrition
- Serving Size: 12
- Calories: 450 per serving

