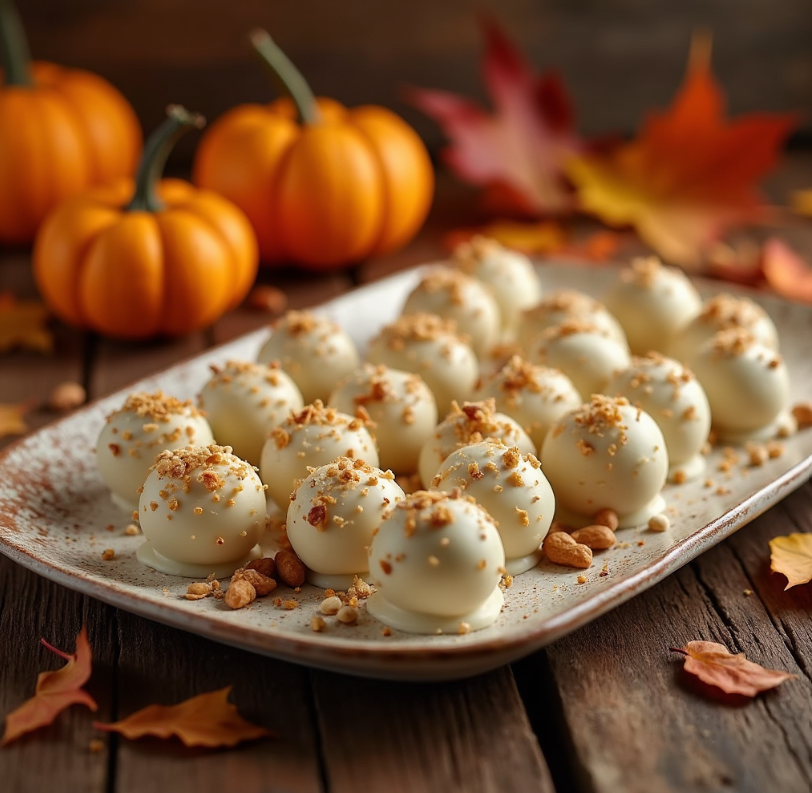
When autumn arrives, the craving for comforting pumpkin-flavored desserts begins. No-bake pumpkin cheesecake balls are a quick and irresistible way to enjoy the season’s favorite flavor without turning on the oven. These bite-sized treats are creamy, spiced to perfection, and easy to make, making them the perfect addition to any gathering or a cozy evening at home.
This recipe blends the rich flavors of pumpkin puree and cream cheese with a touch of warm spices like cinnamon and nutmeg, all rolled into bite-sized balls and coated for a delightful finish. Whether you’re a seasoned baker or a novice in the kitchen, this no-bake dessert will become a staple in your recipe collection.
Table of Contents
Ingredients for Pumpkin Cheesecake Bites
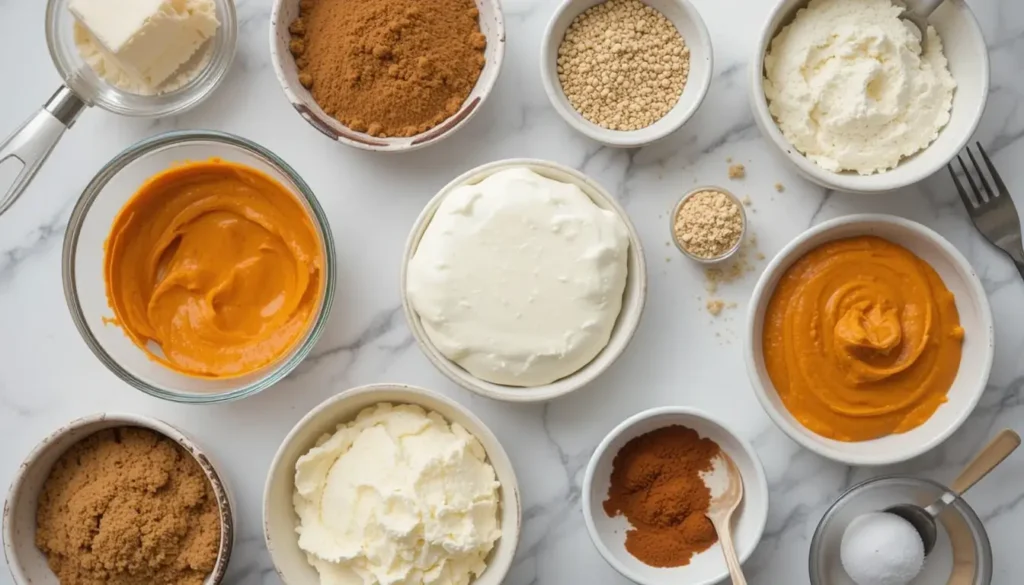
Before we dive into the step-by-step process, it’s essential to gather all the ingredients for your no-bake pumpkin cheesecake balls. Using fresh and high-quality ingredients ensures the best flavor and texture for these treats.
Essential Ingredients for Perfect Pumpkin Cheesecake Bites
- Cream Cheese (8 ounces): Softened to room temperature for easy mixing. Opt for full-fat for a creamier texture.
- Pumpkin Puree (½ cup): Canned puree works well, but avoid pumpkin pie filling as it contains added sugar and spices.
- Powdered Sugar (1 cup): Helps sweeten and bind the mixture smoothly.
- Graham Cracker Crumbs (1½ cups): These add a slight crunch and balance the creamy texture. You can use pre-made crumbs or crush graham crackers yourself.
- Pumpkin Pie Spice (1½ teaspoons): A mix of cinnamon, nutmeg, ginger, and cloves, this spice blend brings warmth and depth to the recipe.
- Vanilla Extract (1 teaspoon): Enhances the overall flavor.
- White Chocolate Chips (Optional, for coating): Melted for dipping the balls, adding a luscious outer shell.
- Chopped Nuts or Sprinkles (Optional): For garnishing and adding visual appeal.
To ensure your no-bake pumpkin cheesecake balls achieve the ideal creaminess, consider which cream cheese is better for cheesecake. Choosing the right cream cheese can make all the difference in flavor and texture.
Substitution Options for No-Bake Fall Treats
- Cream Cheese Substitute: Use vegan cream cheese for a dairy-free option.
- Sugar Alternatives: Swap powdered sugar with coconut sugar (pulverized for finer texture) or a sugar substitute like erythritol.
- Gluten-Free Version: Replace graham cracker crumbs with gluten-free cookie crumbs or almond flour.
- Additional Spices: Feel free to add a pinch of cardamom or allspice for a unique twist.
Equipment Needed
- Mixing Bowl: A large bowl for combining ingredients.
- Hand Mixer or Stand Mixer: Ensures smooth and even mixing.
- Baking Sheet: For setting the balls before coating.
- Parchment Paper: Prevents sticking and makes cleanup easy.
- Small Cookie Scoop or Spoon: Helps shape evenly sized balls.
With these ingredients and tools ready, you’ll be set to make your no-bake pumpkin cheesecake balls effortlessly. Next, we’ll cover the step-by-step preparation process to achieve the perfect treat.
Step-by-Step Guide to Making No-Bake Pumpkin Balls
Step-by-Step Guide to Making No-Bake Pumpkin Cheesecake Balls
Making no-bake pumpkin cheesecake balls is a straightforward process, perfect for when you want a quick yet impressive dessert. Follow these simple steps to create the perfect treat.
Mixing the Base for Creamy Pumpkin Dessert
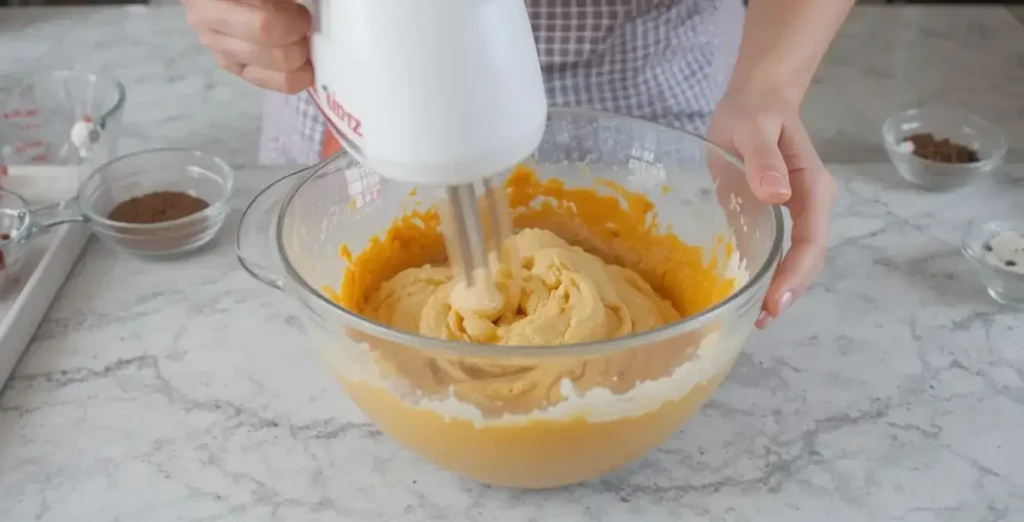
- Soften the Cream Cheese: Ensure the cream cheese is at room temperature for easier mixing. If it’s too cold, microwave it for 10-15 seconds to soften slightly.
- Mix Cream Cheese and Pumpkin: In a large mixing bowl, combine the softened cream cheese and pumpkin puree. Use a hand mixer or stand mixer to blend until the mixture is smooth and creamy, with no lumps.
Sweeten and Flavor
- Add Powdered Sugar: Gradually add the powdered sugar to the mixture, blending well after each addition to avoid clumps.
- Incorporate Spices and Vanilla: Sprinkle in the pumpkin pie spice and pour in the vanilla extract. Mix thoroughly to distribute the flavors evenly throughout the base.
Add the Graham Cracker Crumbs
- Fold in the Crumbs: Slowly add the graham cracker crumbs to the mixture. Stir with a spatula or mixer until the crumbs are fully incorporated, creating a slightly firm but pliable dough.
- Check Consistency: The mixture should be firm enough to shape into balls. If it feels too sticky, add more graham cracker crumbs, one tablespoon at a time.
Shaping Your Pumpkin Cheesecake Bites
- Scoop the Mixture: Use a small cookie scoop or a spoon to portion out equal-sized pieces of the dough.
- Roll into Balls: Roll each portion between your palms to form smooth, bite-sized balls. Place them on a parchment-lined baking sheet as you work.
Chill for Firmness
- Refrigerate the Balls: Place the baking sheet in the refrigerator for at least 1-2 hours, allowing the balls to firm up. This step is crucial for achieving the ideal texture and making them easier to coat.
Coat and Garnish (Optional)
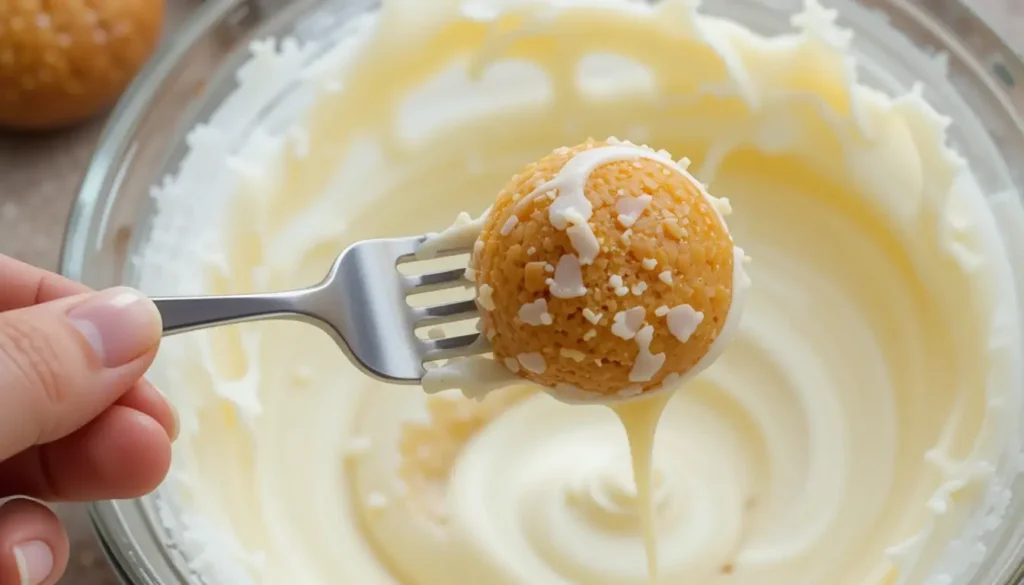
- Prepare the Coating: Melt white chocolate chips in the microwave or over a double boiler. Stir until smooth.
- Dip the Balls: Using a fork or skewer, dip each ball into the melted chocolate, ensuring it’s fully coated. Let any excess drip off.
- Add Toppings: While the chocolate is still wet, sprinkle with chopped nuts, sprinkles, or a dusting of pumpkin pie spice for a decorative touch.
Final Chill
- Set the Coating: Return the coated balls to the parchment-lined baking sheet and refrigerate for another 30 minutes, or until the chocolate hardens.
- Serve and Enjoy: Transfer the no-bake pumpkin cheesecake balls to a serving plate, and enjoy immediately or store them for later.
Now that your treats are ready, let’s explore some pro tips to take this recipe to the next level.
Let me know if you’d like to move on to the next part!
Tips for Perfect Pumpkin Cheesecake Truffles
Crafting the perfect no-bake pumpkin cheesecake balls, therefore, requires a few insider tips to ensure optimal flavor, texture, and presentation. By following these pro tips, you can not only avoid common pitfalls but also elevate your dessert to professional levels effortlessly.
Ensure the Right Consistency
- Adjust as Needed: If your mixture is too soft to roll, add more graham cracker crumbs or a tablespoon of powdered sugar at a time until it firms up.
- Avoid Over-Chilling Before Shaping: If the mixture becomes too firm in the refrigerator, let it sit at room temperature for a few minutes to soften slightly before shaping.
Use High-Quality Ingredients
- Pumpkin Puree: Opt for 100% pure pumpkin puree without added spices or sugars for better control over flavor.
- Cream Cheese: Full-fat cream cheese offers the creamiest texture and richest taste, but you can substitute with reduced-fat versions for a lighter option.
Master the Coating Process
- Melt Chocolate Gently: When melting chocolate, use low heat to prevent it from scorching. A double boiler or microwave in 15-second intervals works well.
- Use a Cooling Rack: After dipping the balls, place them on a cooling rack set over parchment paper. This prevents excess chocolate from pooling around the base.
- Work Quickly: Dip and garnish one ball at a time to ensure the chocolate remains soft enough for toppings to adhere.
Experiment with Flavors
- Add Mix-ins: Incorporate finely chopped nuts, mini chocolate chips, or toffee bits into the mixture for extra texture.
- Customize the Spices: Adjust the spice blend to your preference. For a bolder flavor, add extra cinnamon or a pinch of ground ginger.
Storage and Shelf Life
- Refrigeration: Store the cheesecake balls in an airtight container in the refrigerator for up to five days.
- Freezing Option: These treats freeze well. Place them in a single layer on a baking sheet to freeze, then transfer to a freezer-safe container for up to three months. Thaw in the refrigerator before serving.
Avoid Common Mistakes
- Overmixing: Overmixing can cause the cream cheese to become too loose, making the dough harder to work with. Mix just until ingredients are combined.
- Skipping Chilling Time: Rushing the chilling process can result in sticky, difficult-to-handle balls. Always allow sufficient time for the mixture to firm up.
By following these tips, you’ll create consistently delicious no-bake pumpkin cheesecake balls that will impress family and friends alike. Next, let’s explore creative ways to serve and present these delectable treats.
Creative Ways to Serve Creamy Pumpkin Desserts
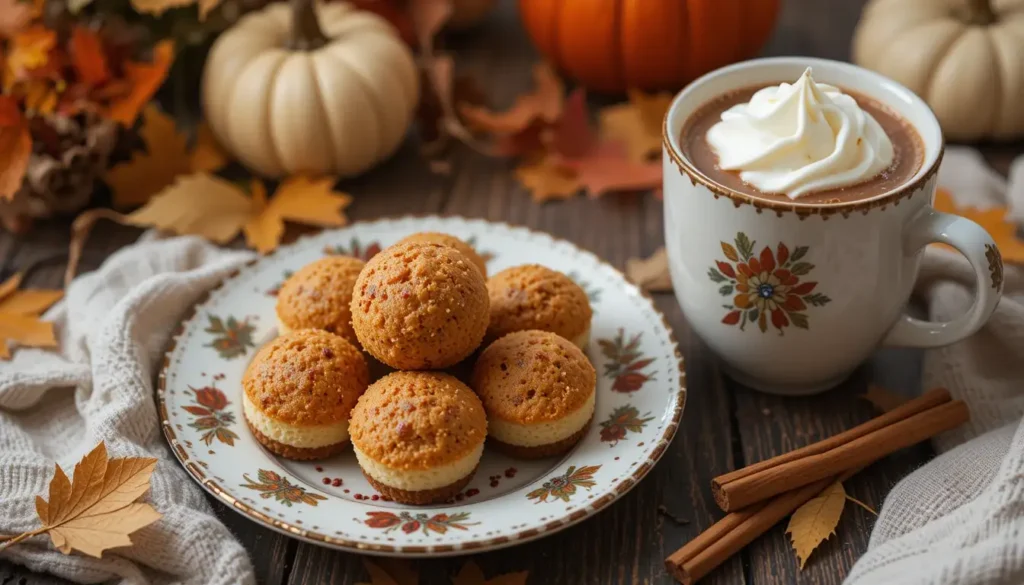
No-bake pumpkin cheesecake balls are versatile treats that can be served in various creative ways to suit any occasion. Whether you’re preparing them for a holiday gathering, a casual get-together, or a cozy snack at home, these ideas will make your presentation shine.
Serving on a Platter
- Seasonal Themes: Arrange the cheesecake balls on a decorative platter, using fall-themed elements like mini pumpkins, cinnamon sticks, or colorful leaves as garnish.
- Add Variety: Mix and match toppings—some coated in chocolate, others in nuts or graham cracker crumbs—to create visual interest.
- Tiered Display: Use a tiered serving tray for a more elegant presentation at parties or events.
Pairing with Beverages
Hot Drinks: Serve alongside a cup of hot cocoa, spiced apple cider, or pumpkin spice latte for a warm, autumnal vibe.
Packaging as Gifts
- Wrap Individually: Wrap each ball in a small piece of parchment or wax paper, tying the ends with ribbon for a festive touch.
- Gift Boxes: Arrange the balls in a decorative box lined with tissue paper or food-safe filler.
- Include a Recipe Card: Add a handwritten or printed recipe card for a personal and thoughtful gift.
Themed Party Ideas
- Pumpkin Patch Party: Present the cheesecake balls in mini cupcake liners, arranged on a table with a pumpkin patch backdrop.
- Halloween Treat: Use orange and black sprinkles or edible glitter for a spooky theme.
- Thanksgiving Spread: Add these treats to a dessert table featuring other pumpkin-based dishes for a cohesive autumn look.
Pairing with Other Desserts
- Dessert Board: Include the cheesecake balls on a dessert charcuterie board with cookies, chocolates, and fresh fruits.
- Ice Cream Topping: Crumble the balls over a scoop of vanilla or cinnamon ice cream for a decadent twist.
- Cake Decorations: Use the balls as edible decorations for cakes or cupcakes, placing them on top for a delightful garnish.
Seasonal Presentation Ideas
- Sprinkle Color Themes: Use sprinkles that match the season, such as gold and red for autumn or green and red for winter holidays.
- Festive Toppers: Add tiny edible toppers, such as candy leaves or pumpkins, for an extra touch of charm.
- Holiday Trays: Arrange the treats on trays with holiday-themed patterns, making them the centerpiece of your dessert table.
No matter how you serve or present these no-bake pumpkin cheesecake balls, their rich, creamy texture and perfectly spiced flavor are sure to delight everyone. In addition, they are incredibly versatile, making them suitable for various occasions. With that in mind, next, we’ll tackle some frequently asked questions to address common concerns and curiosities about this recipe.
FAQs About No-Bake Fall Treats
Your Questions About Pumpkin Cheesecake Truffles, Answered
To help you perfect your no-bake pumpkin cheesecake balls, here are answers to some commonly asked questions. First and foremost, these tips cover everything from customization to storage, and ultimately, they ensure your treats turn out just right every time.
Can I Make These in Advance?
Yes! No-bake pumpkin cheesecake balls are perfect for preparing ahead of time.
- Refrigerator Storage: Store them in an airtight container in the refrigerator for up to five days.
- Freezing Option: Freeze them in a single layer on a parchment-lined baking sheet, then transfer to a freezer-safe container. They can be stored for up to three months. Thaw in the refrigerator before serving.
What If I Don’t Have Pumpkin Pie Spice?
No problem! You can create your own pumpkin pie spice blend with common pantry ingredients. Combine the following:
- 2 teaspoons cinnamon
- ½ teaspoon nutmeg
- ½ teaspoon ginger
- ¼ teaspoon cloves
This mixture can be adjusted to your taste and works as a perfect substitute.
Can I Make These Vegan or Gluten-Free?
Yes, the recipe is easily adaptable.
- Vegan Version: Use vegan cream cheese and replace white chocolate with dairy-free chocolate chips for the coating.
- Gluten-Free Version: Substitute graham cracker crumbs with gluten-free cookie crumbs, almond flour, or crushed gluten-free graham crackers.
What Are Some Alternative Coating Options?
While white chocolate and graham cracker crumbs are popular choices, you can get creative with coatings. Try:
- Dark or Milk Chocolate: For a richer flavor.
- Crushed Nuts: Such as pecans, almonds, or walnuts, for added crunch.
- Coconut Flakes: Toasted or plain, for a tropical twist.
- Cinnamon Sugar: A simple and flavorful coating option.
How Do I Prevent the Mixture From Sticking?
Sticky hands or utensils can make rolling the balls tricky.
- Chill the Mixture: Ensure the mixture is well-chilled before shaping.
- Use Powdered Sugar or Flour: Lightly dust your hands or the scoop with powdered sugar or flour to reduce sticking.
- Work Quickly: Roll the balls quickly to minimize the warmth from your hands softening the dough.
How Should I Serve Them?
No-bake pumpkin cheesecake balls can be served cold or at room temperature. For the best texture and flavor:
- Allow them to sit at room temperature for 5-10 minutes before serving if they’ve been refrigerated.
- Arrange them on a decorative platter or tiered tray for an elegant presentation.
By addressing these FAQs, you can easily tackle any challenges and confidently customize the recipe to suit your preferences. Furthermore, you’ll be equipped with the knowledge to make this dessert truly your own. Now, let’s seamlessly wrap up with a conclusion and a final encouraging note to inspire you to try this delightful treat.
Conclusion
No-bake pumpkin cheesecake balls are the perfect blend of convenience, flavor, and versatility, making them a go-to treat for any occasion. Their creamy texture, spiced pumpkin flavor, and bite-sized format are a hit with guests and family alike. Whether you’re crafting them for a holiday party, a cozy night at home, or a thoughtful gift, this recipe delivers delightful results every time.
With the step-by-step guide, pro tips, and creative serving suggestions provided, you now have everything you need to make these delicious treats. Plus, the adaptability of the recipe ensures it can meet various dietary preferences, from vegan to gluten-free options.
So, grab your ingredients, channel your inner chef, and treat yourself (and your loved ones) to these irresistible no-bake pumpkin cheesecake balls. Once you try them, they’re bound to become a seasonal favorite!
If you’re looking for more quick and easy desserts to complement these cheesecake balls, check out small batch chocolate chip cookies: the perfect treat. Their simplicity and charm make them the perfect companion to these pumpkin-flavored delights.
Print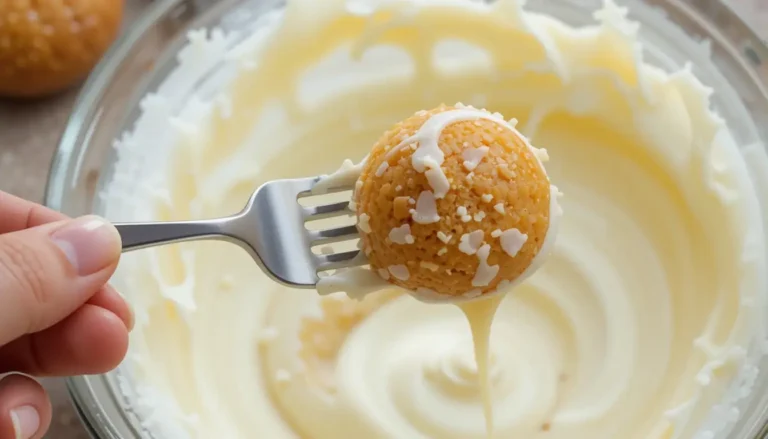
No-Bake Pumpkin Cheesecake Balls
Creamy, spiced pumpkin cheesecake bites coated in a sweet graham cracker crust—perfect for a quick and festive treat!
- Total Time: 21 minute
- Yield: 12–15 balls 1x
Ingredients
- 1 cup cream cheese, softened
- 1/2 cup pumpkin purée
- 1/2 cup powdered sugar
- 1/2 tsp cinnamon
- 1/4 tsp nutmeg
- 1/2 tsp vanilla extract
- 1 cup graham cracker crumbs (plus extra for coating)
Instructions
- In a bowl, mix cream cheese, pumpkin purée, powdered sugar, cinnamon, nutmeg, and vanilla until smooth.
- Stir in graham cracker crumbs until well combined.
- Scoop and roll the mixture into bite-sized balls.
- Roll each ball in extra graham cracker crumbs for coating.
- Refrigerate for at least 1 hour before serving. Enjoy chilled!
- Prep Time: 10 Min
- Chill Time: 1 hr
Nutrition
- Serving Size: 1
- Calories: 120

