Hello Kitty cakes are not just desserts; they are pure magic on a plate! Whether you’re planning a birthday party, celebrating a special occasion, or just want to impress your friends with your baking skills, a Hello Kitty cake is the perfect way to add sweetness to any event.
But wait—how do you actually make one? Don’t worry, I’ve got you covered! In this guide, we’ll explore different Hello Kitty cake designs, essential ingredients, step-by-step baking instructions, and even common problems (with easy fixes). Ready? Let’s bake!
Table of Contents
Why Are Hello Kitty Cakes So Popular?
Since its creation in 1974, Hello Kitty has captured hearts worldwide. This adorable Sanrio character is a symbol of cuteness, friendship, and happiness. Naturally, a cake featuring her face (or even her full figure) is an absolute hit for kids and adults alike. But what makes Hello Kitty cakes so special?
- ✨ Timeless Appeal: Hello Kitty has been a favorite for generations.
- 🎉 Perfect for Any Occasion: Birthdays, baby showers, or just because!
- 🍬 Endless Creativity: From simple to extravagant, there’s a design for everyone.
Now that we know why they’re so loved, let’s dive into choosing the perfect design! 🎨
Choosing the Right Hello Kitty Cake Design
Before we get into baking, let’s decide on the **style** of your cake. Are you going for something simple, or do you want an elaborate, multi-tiered masterpiece? Here are some popular options:
1. Classic Hello Kitty Face Cake
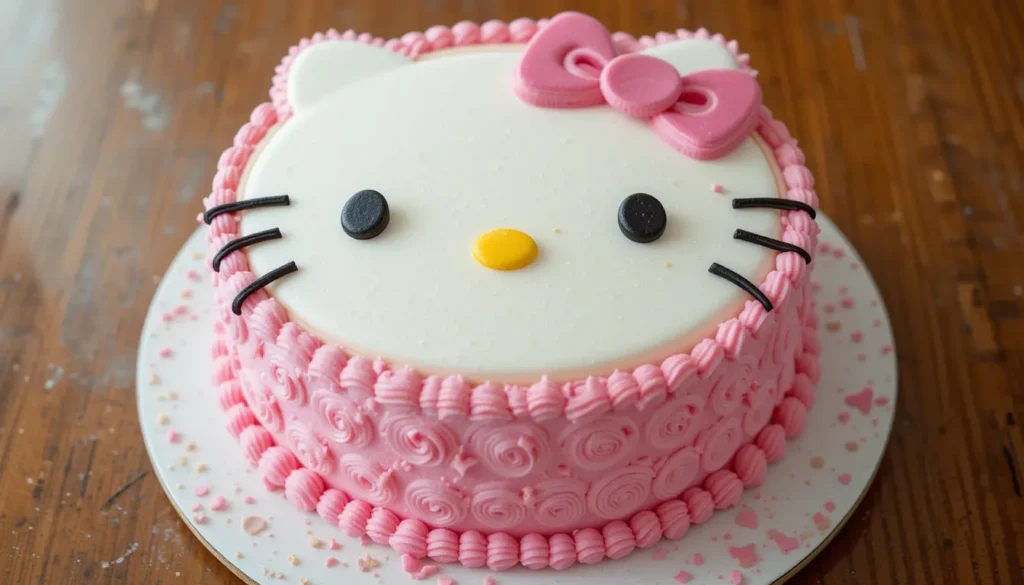
This is the most popular choice! It features Hello Kitty’s adorable face, complete with her iconic bow. This design is easy to make and perfect for beginners.
2. 3D Hello Kitty Cake
If you want to take your cake to the next level, why not make a full 3D version? This requires a bit more effort (and carving skills), but the results are absolutely stunning.
3. Themed Hello Kitty Cakes
You can also add themes like:
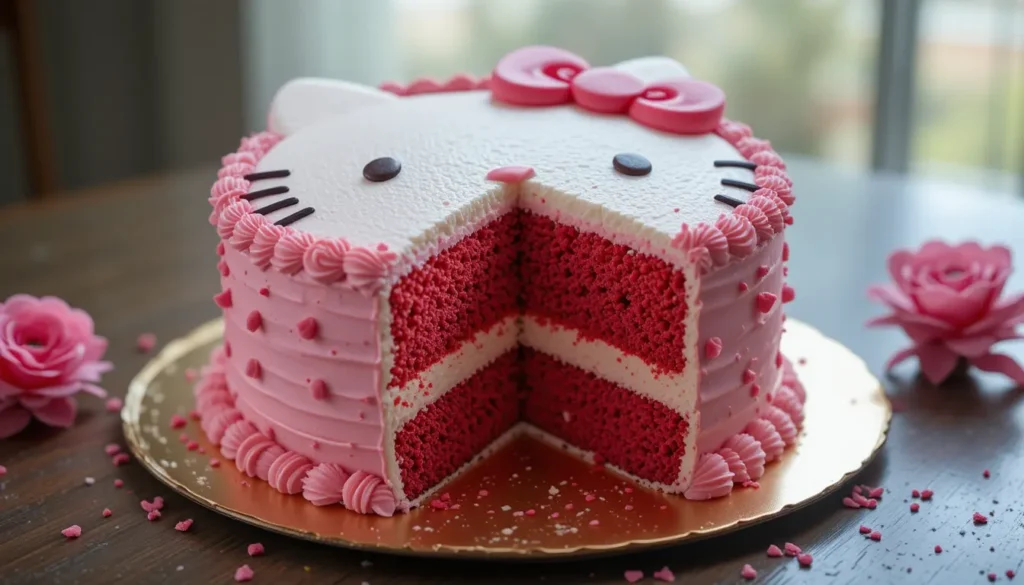
- 💖 **Pink & Floral Hello Kitty Cake** – Soft pastel colors with edible flowers.
- ✨ **Glitter Hello Kitty Cake** – Shimmery decorations for a glamorous touch.
- 🎭 **Cartoon-Style Hello Kitty Cake** – A fun, animated look.
Once you’ve chosen your design, it’s time to gather your ingredients!
Essential Ingredients and Baking Tools

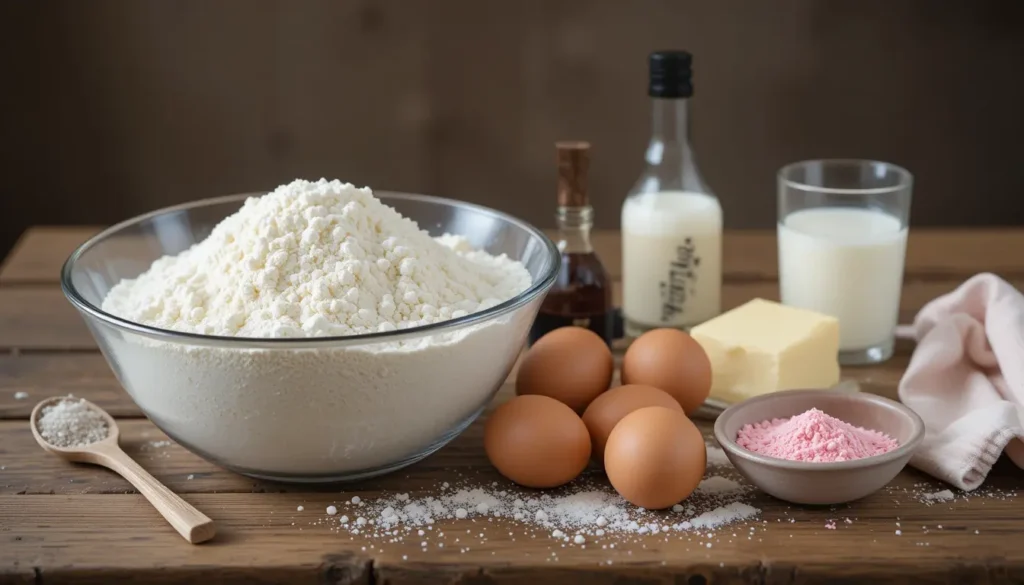
Before we start, let’s make sure we have everything ready. Here’s what you’ll need:
Cake Ingredients
| Ingredient | Quantity |
|---|---|
| All-purpose flour | 2 ½ cups |
| Sugar | 1 ¾ cups |
| Unsalted butter | 1 cup (softened) |
| Eggs | 4 large |
| Milk | 1 cup |
| Vanilla extract | 2 teaspoons |
| Baking powder | 2 teaspoons |
| Salt | ½ teaspoon |
Frosting & Decoration
| Ingredient | Quantity |
|---|---|
| Butter (for buttercream) | 1 cup |
| Powdered sugar | 3 cups |
| Milk or cream | 2-3 tablespoons |
| Pink food coloring | A few drops |
| Black food coloring | For whiskers & eyes |
| Yellow candy or icing | For Hello Kitty’s nose |
Tools You’ll Need
- 🎂 Round cake pans (for the base)
- 🍴 Offset spatula (for smooth frosting)
- 🖌 Piping bags and tips (for detailing)
- 🎨 Fondant tools (if using fondant)
- 🔪 Sharp knife (for carving the cake)
Step-by-Step Guide to Making a Hello Kitty Cake
Alright, now the fun part—baking! Follow these steps carefully for a perfect Hello Kitty cake.
Step 1: Baking the Perfect Cake Base
“A great cake starts with a great base! Make sure to measure ingredients accurately for the best results.”
- Preheat your oven to **350°F (175°C).**
- Grease and flour two round cake pans.
- In a large bowl, whisk together the **flour, baking powder, and salt.**
- In another bowl, beat the **butter and sugar** until light and fluffy.
- Add the **eggs one at a time**, beating well after each addition.
- Mix in the **vanilla extract.**
- Gradually add the dry ingredients, alternating with the **milk.**
- Pour the batter evenly into the cake pans and smooth the top.
- Bake for **30-35 minutes**, or until a toothpick comes out clean.
- Let the cakes cool completely before decorating.
Step 2: Shaping & Carving the Cake
Once your cake is cool, it’s time to give it the **Hello Kitty** shape!
- Use a sharp knife to cut the round cake into a Hello Kitty face shape.
- Use smaller pieces to create her ears and attach them with frosting.
- Crumb coat the cake with a thin layer of buttercream and chill for 15 minutes.
Step 3: Coloring and Preparing Frosting or Fondant
Now that we’ve shaped the cake, it’s time to bring Hello Kitty to life with some frosting magic! 🌟 You have two main options: **buttercream frosting** (easier to work with) or **fondant** (for a smooth, polished look).
Buttercream Frosting Method
“Smooth, creamy, and delicious—buttercream is a beginner-friendly way to decorate cakes like a pro!”
- In a large bowl, beat **1 cup of butter** until light and fluffy.
- Gradually add **3 cups of powdered sugar**, mixing well after each addition.
- Add **2-3 tablespoons of milk or cream** to get a smooth consistency.
- Divide the frosting into separate bowls:
- ❄️ **White frosting** (for Hello Kitty’s face) – Leave some frosting plain.
- 🎀 **Pink frosting** (for the bow) – Add a few drops of pink food coloring.
- 🖤 **Black frosting** (for whiskers, eyes) – Use black gel food coloring.
Fondant Covering Method
If you want a super smooth finish, fondant is the way to go!
- Roll out **white fondant** on a lightly floured surface until it’s about **¼ inch thick.**
- Carefully drape it over the cake, smoothing it out with your hands.
- Trim off excess fondant using a sharp knife.
- Use **black fondant** for the whiskers and eyes, and **pink fondant** for the bow.
Step 4: Decorating Techniques for a Professional Look

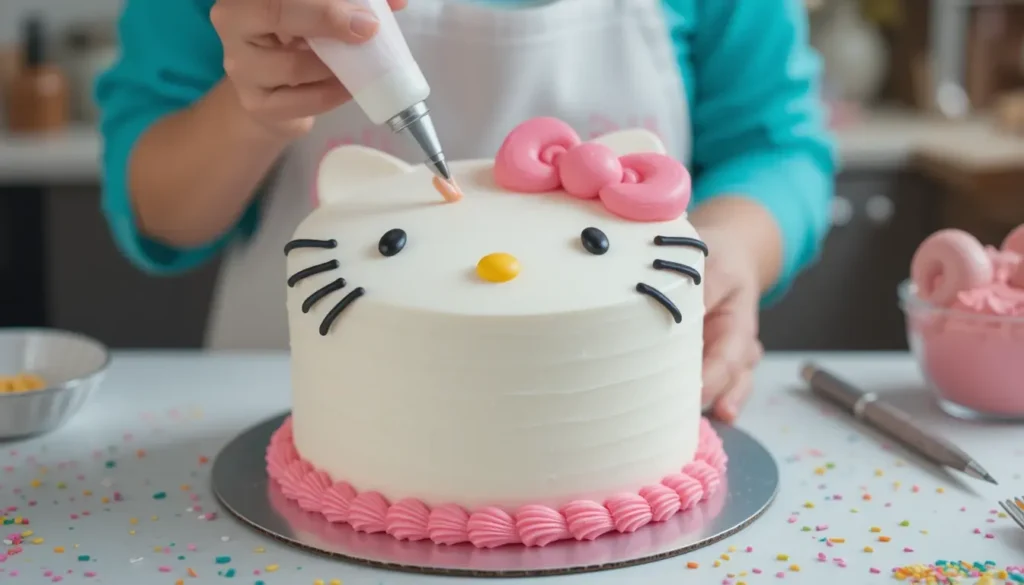
Now comes the most exciting part—decorating! Let’s add Hello Kitty’s signature features.
Creating Hello Kitty’s Face
- Use a **piping bag with white frosting** to cover the entire cake smoothly.
- Pipe **black frosting** to draw her whiskers and eyes (you can also use black fondant strips).
- For the **nose**, place a small yellow candy or pipe a yellow dot with frosting.
Making the Iconic Hello Kitty Bow
Her bow is what makes her instantly recognizable! You can make it with:
- 🎂 **Buttercream:** Pipe a bow shape using pink frosting.
- 🍥 **Fondant:** Cut out a bow shape, pinch the center slightly, and place it on the cake.
At this point, your cake is starting to look like Hello Kitty! But what if something goes wrong? Don’t worry—I’ve got solutions for you!
Common Problems When Making a Hello Kitty Cake (And How to Fix Them!)
Let’s be real—cake decorating can be tricky, and things don’t always go as planned. Here are some common issues and how to fix them:
Problem: Cake Cracking or Sinking
Why it happens: Overmixing, underbaking, or opening the oven too soon.
Solution:
- Use **room temperature ingredients** to create a stable batter.
- Don’t overmix—just mix until combined.
- Check with a toothpick before taking the cake out of the oven.
Problem: Fondant Cracking or Not Sticking
Why it happens: Fondant dries out too quickly or isn’t properly adhered.
Solution:
- Knead fondant with **a little shortening** to keep it soft.
- Brush a thin layer of **water or corn syrup** on the cake before placing the fondant.
Problem: Buttercream Looks Uneven or Has Air Bubbles
Why it happens: Trapped air while mixing or uneven spreading.
Solution:
- Use a **paddle attachment** (instead of a whisk) when mixing buttercream.
- Let the buttercream rest for a few minutes, then stir slowly to remove bubbles.
- Smooth with an **offset spatula** or a warm bench scraper.
Problem: The Cake Shape Looks Wrong
Why it happens: Uneven carving or incorrect measurements.
Solution:
- Use a **printed template** to guide your carving.
- Chill the cake before cutting to get cleaner lines.
- Use extra cake pieces to build up areas if needed.
Creative Hello Kitty Cake Decoration Ideas
Want to take your Hello Kitty cake to the next level? Try these fun variations!
Edible Glitter and Sprinkles
Dust your cake with a touch of **edible glitter** for a magical sparkle. You can also add pink or white **sprinkles** for extra cuteness!
Piping Techniques for Extra Detail
If you’re skilled with a piping bag, try adding **textured buttercream ruffles** or **swirls** to make your cake look even more elegant.
How to Make a Cute Hello Kitty Cake Topper
Instead of just decorating the cake itself, why not make a **mini fondant Hello Kitty topper**? Here’s how:
- Roll a small ball of white fondant for the head.
- Add black fondant for the eyes, yellow for the nose, and whiskers.
- Create a pink bow and attach it with a little water.
- Let it dry, then place it on top of the cake!
Nutrition Facts (Per Slice)
Here’s an estimated breakdown of what you’re indulging in!
| Nutrient | Amount |
|---|---|
| Calories | 320 kcal |
| Fat | 12g |
| Sugar | 35g |
| Protein | 4g |
DIY vs. Ordering a Custom Hello Kitty Cake: Which is Better?
So, should you make your Hello Kitty cake from scratch or order one from a bakery? Let’s weigh the pros and cons of both!
DIY: Budget-Friendly & Fun
If you love baking, making a Hello Kitty cake yourself is a fantastic option. Not only is it **more affordable**, but it’s also **super rewarding!**
| Pros | Cons |
|---|---|
| Cost-effective | Requires time & effort |
| Customizable to your liking | May not be as polished as a professional cake |
| Great for learning new skills | Risk of mistakes if you’re a beginner |
Ordering: Hassle-Free & Professional
If you’re short on time or want a **perfect, bakery-style cake**, ordering from a professional baker is the way to go. However, it can be a bit pricey! 💸
| Pros | Cons |
|---|---|
| Professional-quality design | Expensive |
| Saves time & effort | Less personal & customizable |
| Perfect for special occasions | Needs to be ordered in advance |
💡 My Advice: If you love baking and have the time, go for DIY! But if it’s a big event and you want perfection, ordering a custom Hello Kitty cake is worth it.
Tips for Storing and Transporting a Hello Kitty Cake
You’ve worked so hard on your beautiful cake—now, let’s make sure it stays intact! Here’s how to **store and transport** it safely.
How to Store Your Hello Kitty Cake
- For **buttercream cakes**: Store in an airtight container in the **fridge for up to 3 days**.
- For **fondant-covered cakes**: Keep at **room temperature in a cool, dry place** (fondant doesn’t like moisture!).
- If freezing: Wrap slices in plastic wrap and freeze for up to **1 month**.
Transporting Your Cake Without Damage
“The key to transporting a cake is keeping it stable—because no one wants a lopsided Hello Kitty!”
- Place the cake on a **flat surface** (not on a car seat!).
- Use a cake box or a **non-slip mat** under the cake board.
- Drive **slowly on turns and bumps**—cakes are delicate!
Fun Hello Kitty Cake Variations
Looking for something a little different? Try these creative **Hello Kitty cake variations!**
Hello Kitty Cupcakes
Perfect for parties! Decorate mini cupcakes with Hello Kitty faces using buttercream or edible toppers.
Vegan & Gluten-Free Hello Kitty Cake
Yes, you can make a **delicious vegan or gluten-free** version! Use **almond flour, plant-based milk, and coconut oil** instead of regular ingredients.
Mini Hello Kitty Cakes
Instead of one big cake, make **small individual Hello Kitty cakes**—adorable and easy to serve!
Frequently Asked Questions About Hello Kitty Cakes
Q: Can I use a cake mix instead of making the cake from scratch?
A: Absolutely! If you’re short on time, a **vanilla or chocolate cake mix** works just fine. Just make sure to let it cool before decorating!
Q: What’s the best frosting for a Hello Kitty cake?
A: Buttercream is the easiest for beginners, but **fondant gives a smoother, professional look.** Choose based on your comfort level!
Q: Can I make a Hello Kitty cake without special tools?
A: Yes! You can carve the cake with a **sharp knife** and use a **plastic bag with the tip cut off** instead of a piping bag. DIY for the win!
Q: How far in advance can I make a Hello Kitty cake?
A: You can bake the cake **2 days in advance** and store it wrapped in plastic. Decorate **on the day of serving** for the best freshness!
Conclusion: Bringing Your Hello Kitty Cake to Life

And there you have it—a complete guide to making a **beautiful, delicious, and Instagram-worthy** Hello Kitty cake!
“Baking is an art, and with a little practice, you can create a Hello Kitty cake that looks like it came straight from a bakery!”
Whether you go for a **simple Hello Kitty face cake** or an **elaborate 3D design**, the key is to **have fun and enjoy the process.**
Before you go, let’s recap some important tips:
- 🎂 **Choose a design** that matches your skill level.
- 🧁 **Use buttercream or fondant** based on your preference.
- 🚨 **Fix common cake problems** with simple solutions.
- 🚚 **Store and transport your cake carefully** to keep it looking perfect!
Now it’s time to put on your apron, gather your ingredients, and start baking! And don’t forget to share your masterpiece with family, friends, or on social media.
Happy baking! 🍰💕
If you are looking for Dinner quick and nice recipe check This Million Dollar Chicken Casserole it tastes like pure Gold!

